Deals
New & Featured
Departments
- Automotive
- ATVs, Snowmobiles, Motorcycles Parts & Accessories
- ATVs, Snowmobiles, Motorcycles Parts & Accessories Sales
- ATVs, Snowmobiles, Motorcycles Parts & Accessories Clearance
- ATV & UTV Parts & Accessories
- Motorcycle Parts & Accessories
- Snowmobile Parts & Accessories
- Audio & Electronics
- Auto Body Repair, Paints & Accessories
- Auto Lighting
- Auto Parts
- Auto Body Parts
- Brakes
- Drivetrain & Transmission
- Electrical & Wiring
- Emission & Exhaust Systems
- Engine & Ignition
- Filters & PCV Valves
- Fuel Delivery
- Heating, A/C & Engine Cooling
- Antifreeze & Coolant System Additives & Chemicals
- Cabin Air Filters
- Engine Cooling Parts
- Engine Heaters
- Heating & A/C Parts
- Heating, A/C & Engine Cooling Tools
- Refrigerants & A/C Additives
- Sensors, Switches & Relays
- Oil Delivery Parts
- Performance Parts
- Starters & Alternators
- Steering & Alignment
- Suspension Parts
- Wiper Blades & Parts
- Auto Shelters
- Auto Tools
- Auto Body Repair Tools
- Brake System Tools
- Diagnostic & Testing Tools
- Drivetrain & Transmission Tools
- Electrical Tools & Kits
- Fuel System Tools
- Garage & Auto Shop Storage & Equipment
- General Service Tools
- Grease & Lubrication Tools
- Heating, A/C & Engine Cooling Tools
- Oil Change Tools & Accessories
- Repair Manuals
- Steering, Suspension & Alignment Tools
- Tire & Wheel Tools
- Batteries, Maintenance & Accessories
- Auto & Specialty Batteries
- Battery Booster Packs & Jump Starters
- Battery Cables & Hold Downs
- Battery Chargers
- Battery Terminals
- Battery Testers & Tools
- Booster Cables
- EV Chargers
- Power Inverters
- Car Detailing & Care Products
- Car Safety & Security
- Exterior Accessories
- Interior Accessories
- 12V Car Chargers & Plug-In Accessories
- Car Air Fresheners
- Car Safety & Security
- Car Seats
- Car Warmers
- Car Window Shades & Visors
- Car Window Tint
- Floor Mats & Liners
- Interior Car Mirrors
- Interior Car Organizers
- Interior Dress-Up Accessories
- Keychains
- Seat Covers & Cushions
- Steering Wheel Covers
- Oils, Fluids, Additives & Chemicals
- Antifreeze & Coolant System Additives & Chemicals
- Brake & Power Steering Fluids & Additives
- Diesel Fluids
- Engine Oils & Additives
- Fuel System Additives & Cleaners
- Grease, Gear Oils & Lubricants
- Oil Change Tools & Accessories
- Refrigerants & A/C Additives
- Stop Leaks
- Transmission Fluids & Additives
- Windshield Washer Fluids
- RV Parts & Accessories
- RV Electrical Accessories
- RV Exterior
- RV Fresh Water Accessories
- RV Interior
- RV Leveling & Stabilization
- RV Lighting
- RV Maintenance
- RV Plumbing & Sanitation
- Tires & Wheels
- Trailers & Towing Accessories
- Truck Accessories
- Cargo Management
- Exhaust Systems
- Exterior Truck Accessories
- Floor Mats & Liners
- Jeep Accessories
- LED Light Bars
- Light Pods & Utility Lights
- Mounts & Accessories
- Mud Flaps & Splash Guards
- Performance Air Filters
- Running Boards & Steps
- Seat Covers & Cushions
- Snow Plows, Mounts & Accessories
- Tonneau Covers
- Trailers & Towing Accessories
- ATVs, Snowmobiles, Motorcycles Parts & Accessories
- Home
- Appliances
- Hair Care
- Irons & Steamers
- Kitchen Appliances
- Blenders & Juicers
- Breadmakers
- Carbonated Water Makers & Accessories
- Coffee Grinders
- Coffee Makers
- Coffee, Espresso & Tea
- Cookers
- Espresso Machines & Makers
- Food Dehydrators
- Food Mixers & Accessories
- Food Processors & Choppers
- Fryers
- Hot Plates & Food Warmers
- Ice Makers
- Indoor Grilling
- Kettles
- Meat Grinders & Slicers
- Microwaves
- Popcorn Makers
- Toasters
- Waffle Makers
- Portable Dishwashers & Replacement Parts
- Range Hoods & Accessories
- Refrigerators & Beverage Coolers
- Sewing Machines
- Shavers, Trimmers & Hair Removal
- Vacuum Cleaners
- Water Coolers
- Bath
- Bath Mats & Rugs
- Bathroom Accessories
- Bathroom Exhaust Fans & Accessories
- Bathroom Hardware
- Bathroom Storage & Organization
- Bathroom Vanities
- Bathtubs, Showers & Accessories
- Hand & Bath Towels
- Beauty, Health & Wellness
- Bath, Body & Skin Care
- Fitness & Exercise
- Fitness & Training Recovery
- Hair Care
- Health Care Devices & Accessibility Equipment
- Heating, Cooling & Air Quality
- Oral Care
- Protective Face Masks & Coverings
- Shavers, Trimmers & Hair Removal
- Spa, Massage & Aromatherapy
- Sun Protection.
- Heating, Cooling & Air Quality
- Home Decor
- Home Electronics
- Home Furniture
- Baby Furniture
- Bedroom Furniture
- Entryway Furniture
- Kitchen & Dining Room Furniture
- Living Room Furniture
- Office Furniture
- Rugs & Flooring
- Toddler & Kids Furniture
- Window Treatments
- Home Safety & Security
- Household & Cleaning Supplies
- Air Fresheners
- Cleaners
- Cleaning Tools
- Dish Cleaning
- Drain Cleaners
- Floor Cleaning
- Garbage Cans & Bags
- Laundry Supplies
- Paper Products
- Plungers
- Vacuum Cleaners
- Kitchenware
- Bakeware
- Coffee, Espresso & Tea
- Cookware
- Dining & Entertaining
- Food Organizers
- Kitchen Appliances
- Blenders & Juicers
- Breadmakers
- Carbonated Water Makers & Accessories
- Coffee Grinders
- Coffee Makers
- Coffee, Espresso & Tea
- Cookers
- Espresso Machines & Makers
- Food Dehydrators
- Food Mixers & Accessories
- Food Processors & Choppers
- Fryers
- Hot Plates & Food Warmers
- Ice Makers
- Indoor Grilling
- Kettles
- Meat Grinders & Slicers
- Microwaves
- Popcorn Makers
- Toasters
- Waffle Makers
- Kitchen Linens
- Kitchen Storage & Organization
- Kitchen Tools & Gadgets
- Knives & Cutting Accessories
- Portable Drinkware
- Lighting
- Moving Supplies
- Office & School Supplies
- Paints & Stains
- Party City
- Bakeware
- Balloons & Accessories
- Birthday Invitations & Valentine's Day Cards
- Gift Wrapping Supplies
- Household & Cleaning Supplies
- Party Decorations
- Party Favours
- Arts & Crafts Supplies
- Bags
- Bubbles & Bubble Toys
- Cups, Containers & Treat Boxes
- Favour Ties, Tags & Charms
- Giveaway Toys
- Glow Sticks
- Jewelry
- Party & Birthday Hats
- Party Favour Gift Sets
- Pins, Buttons & Patches
- Stationery
- Stickers
- Temporary Tattoos
- Trophies & Ribbons
- Wands
- Water Balloons
- Water Blasters & Soakers
- Whistle & Noisemakers
- Tableware
- Toys & Games
- Action Figures
- Arts & Crafts Supplies
- Board Games & Puzzles
- Building Sets & Blocks
- Card Games
- Collectibles
- Dolls & Playsets
- Games Room
- Kids Electronics
- Pretend Play
- Remote Control Vehicles
- Science & Educational Toys
- Stuffed & Plush Animals
- Toddler & Preschool Toys
- Toy Blasters
- Toy Cars, Trains & Race Tracks
- Toy Storage
- Sinks, Faucets & Fixtures
- Bathroom Sinks & Faucets
- Bathroom Vanities
- Bathtubs, Showers & Accessories
- Kitchen Sinks & Faucets
- Laundry Tubs & Faucets
- Shower Wall Panels
- Showerheads & Hand Showers
- Toilets & Accessories
- Smart Home
- Snacks & Beverages
- Storage & Organization
- Baskets
- Bathroom Storage & Organization
- Closet Storage & Organization
- Garage Organization & Tool Storage
- Garage Door Openers & Hardware
- Garage Stools
- Garage Storage Cabinets
- Garage Storage Shelves & Racks
- Garage Wall & Ceiling Organization
- Plastic Storage Containers & Totes
- Portable Work Lights
- Tool Bags, Boxes & Organizers
- Tool Belts & Aprons
- Tool Chests, Cabinets & Accessories
- Tool Pouches & Holders
- Utility & Tool Carts
- Workbenches & Workstands
- Hanging Hooks
- Kitchen Storage & Organization
- Laundry Storage & Organization
- Shelving & Racks
- Shoe Racks & Storage
- Shopping Carts & Bags
- Storage Bins
- Storage Drawers & Carts
- Storage Furniture
- Toy Storage
- Vacuum Storage Bags
- Appliances
- Outdoor Living
- Backyard Pools & Supplies.
- Christmas
- Christmas Candies & Gift Sets
- Christmas Decorations & Ornaments
- Christmas Entertaining
- Christmas Lights
- Christmas Icicle Lights
- Christmas Inflatables
- Christmas Lawn Décor
- Christmas Light Clips & Accessories
- Christmas Light Projectors
- Christmas Lit Signs & Lanterns
- Christmas Net Lights
- Christmas Pathway Lights
- Christmas Rope Lights
- Christmas Solar Lights
- Christmas String Lights
- Replacement Christmas Bulbs
- Smart Christmas Lights & Decor
- Christmas Stockings & Accessories
- Christmas Storage
- Christmas Trees & Accessories
- Christmas Wreaths & Garlands
- Festive Pets
- Gift Wrapping & Accessories
- Indoor Christmas Décor
- Outdoor Christmas Décor
- Pyjamas & Robes
- Gazebos, Pergolas & Canopies
- Generators & Accessories
- Lawn & Garden
- Mosquito, Insect & Pest Control
- Outdoor Cooking & BBQs
- Outdoor Dining & Entertaining
- Outdoor Heating
- Outdoor Lighting
- Outdoor Power Equipment.
- Chainsaws
- Grass Trimmers
- Hedge Trimmers
- Lawn & Garden Batteries.
- Lawn Mowers
- Lawn Tractors, Riding Mowers & Attachments
- Leaf Blowers & Accessories
- Log Splitters, Wood Chippers & Shredders
- Outdoor Power Tool Accessories
- Pressure Washers, Parts & Accessories
- Snowblowers.
- Tillers & Cultivators
- Outdoor Recreation
- Outdoor Storage
- Patio Furniture & Décor
- Snow Removal Equipment & Tools
- Solar Power Systems
- Tools & Hardware
- Air Tools & Compressors
- Electrical
- Conduits & Fittings
- Cord Covers & Cable Organizers
- Dimmers, Switches & Timers
- Electrical Boxes
- Electrical Motor Parts
- Electrical Plugs, Connectors & Adapters
- Electrical Tools & Accessories
- Extension Cords
- Fuses, Breakers & Panel Boxes
- Household Batteries
- Power Bars & Surge Protectors
- Wall Plates & Outlet Covers
- Wall Receptacles
- Weatherproof Electrical Fittings
- Wiring & Cables
- Exterior Repair & Maintenance Supplies
- Garage Organization & Tool Storage
- Garage Door Openers & Hardware
- Garage Stools
- Garage Storage Cabinets
- Garage Storage Shelves & Racks
- Garage Wall & Ceiling Organization
- Plastic Storage Containers & Totes
- Portable Work Lights
- Tool Bags, Boxes & Organizers
- Tool Belts & Aprons
- Tool Chests, Cabinets & Accessories
- Tool Pouches & Holders
- Utility & Tool Carts
- Workbenches & Workstands
- Hand Tools
- Hardware
- Ladders & Scaffolding
- Paints & Stains
- Plumbing
- Power Tool Accessories
- Power Tools
- Buffers & Polishers
- Combo Kits
- Drill Presses & Lathes
- Drills & Accessories
- Grinders
- Heat Guns
- Impact Drivers
- Impact Wrenches
- Nailers & Staplers
- Oscillating Tools
- Planers & Joiners
- Power Tool Accessories
- Rotary Tools
- Routers
- Sanders
- Saws
- Specialty Power Tools
- Shop Vacuums
- Sinks, Faucets & Fixtures
- Bathroom Sinks & Faucets
- Bathroom Vanities
- Bathtubs, Showers & Accessories
- Kitchen Sinks & Faucets
- Laundry Tubs & Faucets
- Shower Wall Panels
- Showerheads & Hand Showers
- Toilets & Accessories
- Welding & Soldering Tools
- Work Wear & Safety Gear
- Sports & Recreation
- Bikes & Accessories
- Camping & Hiking
- Clothing, Shoes & Accessories
- Clothing
- Fan Zone
- Hats, Gloves & Accessories
- Hunting Clothes & Apparel
- Mosquito & Bug Net Gear
- Pyjamas & Robes
- Rain Gear
- Shoes & Boots
- Snowmobile Riding Gear
- Wetsuits & Water Shoes
- Winter Apparel
- Work Wear & Safety Gear
- Fishing
- Fitness & Exercise
- Games Room
- Golf & Precision Sports
- Hunting
- Luggage & Suitcases
- Outdoor Recreation
- Racquet Sports
- Team Sports
- Baseball & Softball
- Basketball
- Cricket
- Curling
- Fan Zone
- Football
- Hockey
- Lacrosse
- Soccer
- Volleyball
- Water Sports & Boating
- Boating & Marine
- Canoe & Kayak Accessories
- Canoe, Kayak & Stand Up Paddle Board Carriers
- Kayaks & Canoes
- Life Jackets/PFDs.
- Paddles, Oars & Accessories
- Stand Up Paddle Boards & Accessories
- Sun Protection.
- Swimming
- Tow Ropes & Accessories
- Towable Tubes & Accessories
- Wakeboards & Water Skis
- Water Toys & Floats.
- Wetsuits & Water Shoes
- Winter Sports
- Curling
- Hockey
- Ice Skates
- Sledding
- Snow Goggles
- Snow Helmets
- Snowboards
- Snowshoeing
- Winter Apparel
- Tires & Wheels
- Kitchen & Dining
- Bakeware
- Coffee, Espresso & Tea
- Cookware
- Dining & Entertaining
- Food Organizers
- Kitchen Appliances
- Blenders & Juicers
- Breadmakers
- Carbonated Water Makers & Accessories
- Coffee Grinders
- Coffee Makers
- Coffee, Espresso & Tea
- Cookers
- Espresso Machines & Makers
- Food Dehydrators
- Food Mixers & Accessories
- Food Processors & Choppers
- Fryers
- Hot Plates & Food Warmers
- Ice Makers
- Indoor Grilling
- Kettles
- Meat Grinders & Slicers
- Microwaves
- Popcorn Makers
- Toasters
- Waffle Makers
- Kitchen Linens
- Kitchen Storage & Organization
- Kitchen Tools & Gadgets
- Knives & Cutting Accessories
- Portable Drinkware
- Vacuum Cleaners
- Storage & Organization
- Baskets
- Bathroom Storage & Organization
- Closet Storage & Organization
- Garage Organization & Tool Storage
- Garage Door Openers & Hardware
- Garage Stools
- Garage Storage Cabinets
- Garage Storage Shelves & Racks
- Garage Wall & Ceiling Organization
- Plastic Storage Containers & Totes
- Portable Work Lights
- Tool Bags, Boxes & Organizers
- Tool Belts & Aprons
- Tool Chests, Cabinets & Accessories
- Tool Pouches & Holders
- Utility & Tool Carts
- Workbenches & Workstands
- Hanging Hooks
- Kitchen Storage & Organization
- Laundry Storage & Organization
- Shelving & Racks
- Shoe Racks & Storage
- Shopping Carts & Bags
- Storage Bins
- Storage Drawers & Carts
- Storage Furniture
- Toy Storage
- Vacuum Storage Bags
- Toys & Games
- Action Figures
- Arts & Crafts Supplies
- Board Games & Puzzles
- Building Sets & Blocks
- Card Games
- Collectibles
- Dolls & Playsets
- Games Room
- Kids Electronics
- Pretend Play
- Remote Control Vehicles
- Science & Educational Toys
- Stuffed & Plush Animals
- Toddler & Preschool Toys
- Toy Blasters
- Toy Cars, Trains & Race Tracks
- Toy Storage
- Luggage & Suitcases
- Clothing, Shoes & Accessories
- Clothing
- Fan Zone
- Hats, Gloves & Accessories
- Hunting Clothes & Apparel
- Mosquito & Bug Net Gear
- Pyjamas & Robes
- Rain Gear
- Shoes & Boots
- Snowmobile Riding Gear
- Wetsuits & Water Shoes
- Winter Apparel
- Work Wear & Safety Gear
- Pet Care
- Baby
- Party City
- Bakeware
- Balloons & Accessories
- Birthday Invitations & Valentine's Day Cards
- Gift Wrapping Supplies
- Household & Cleaning Supplies
- Air Fresheners
- Cleaners
- Cleaning Tools
- Dish Cleaning
- Drain Cleaners
- Floor Cleaning
- Garbage Cans & Bags
- Laundry Supplies
- Paper Products
- Plungers
- Vacuum Cleaners
- Party Decorations
- Party Favours
- Arts & Crafts Supplies
- Bags
- Bubbles & Bubble Toys
- Cups, Containers & Treat Boxes
- Favour Ties, Tags & Charms
- Giveaway Toys
- Glow Sticks
- Jewelry
- Party & Birthday Hats
- Party Favour Gift Sets
- Pins, Buttons & Patches
- Stationery
- Stickers
- Temporary Tattoos
- Trophies & Ribbons
- Wands
- Water Balloons
- Water Blasters & Soakers
- Whistle & Noisemakers
- Tableware
- Toys & Games
- Action Figures
- Arts & Crafts Supplies
- Board Games & Puzzles
- Building Sets & Blocks
- Card Games
- Collectibles
- Dolls & Playsets
- Games Room
- Kids Electronics
- Pretend Play
- Remote Control Vehicles
- Science & Educational Toys
- Stuffed & Plush Animals
- Toddler & Preschool Toys
- Toy Blasters
- Toy Cars, Trains & Race Tracks
- Toy Storage
- Shop Canadian
- All Brands
- Sales & Clearance
- Services & Gift Cards
- Patio
- Tires
- Summer Awaits
- Party City
- Book Auto Service
This paragraph should be hidden.

NOMA iQ™ CUSTOMER HELP CENTRE
Welcome to the NOMA iQ™ help centre where you can find instructions and information on troubleshooting your NOMA iQ™ products.

Getting Started: How to Set Up the NOMA iQ™ App
Follow these four simple steps to get your device set up with NOMA iQ™ products.
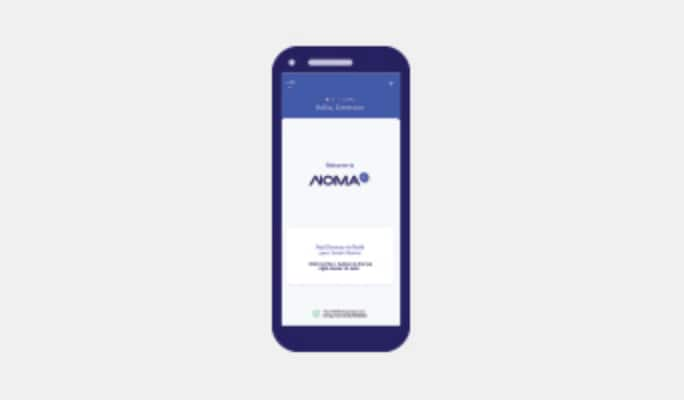
Download the NOMA iQ™ App
Download the NOMA iQ™ app from the App Store or Google Play to your mobile device. Launch the app and register using your email address. Create a password, then login to the app or login if you already have an account.
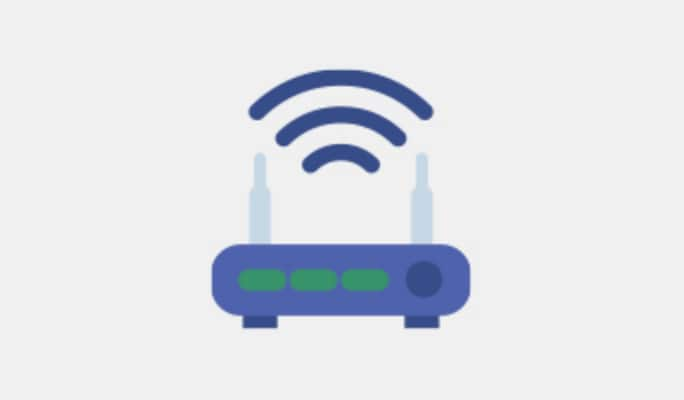
Network & System Requirements
Verify your network and ensure your mobile device is connected to a 2.4 GHz Wi-Fi channel. No hub required. Mobile device must have iOS 16.0 or higher, or Android 9 or higher operating systems.
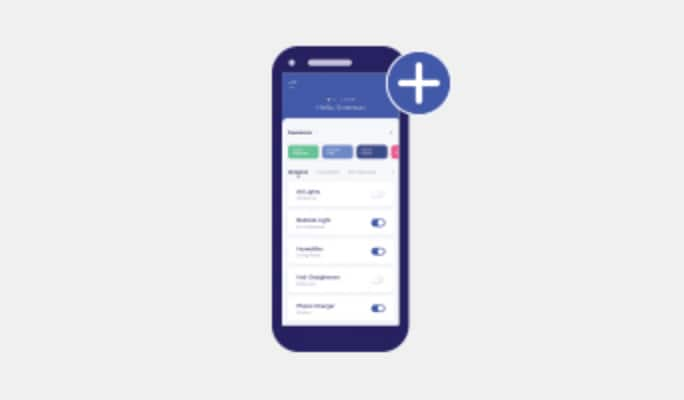
Add a Product
Install your smart product and make sure to enable and give permission for Bluetooth and Location Services on your mobile device. In the NOMA iQ™ app, select the "+" symbol in the top right-hand corner. Select your smart product and follow the instructions within the app.
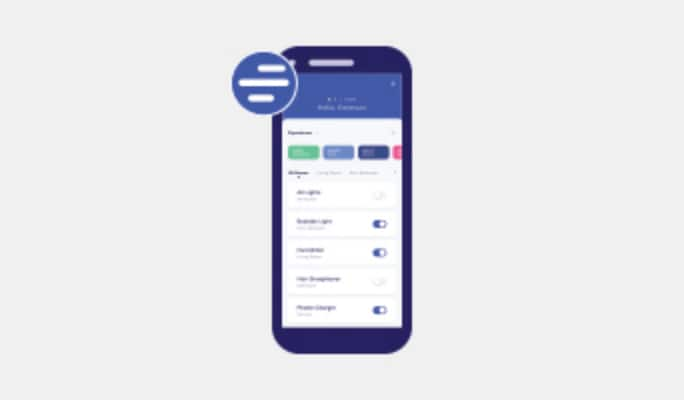
Set Up Your Voice Assistant
Go to the menu at the top left corner of the app and select "Voice Assistants." Choose your voice assistant and follow the instructions.
NOMA iQ™ Troubleshooting Videos
Need help setting up your device? Watch these videos to help guide you through your connections and set up.
How to Configure Your Wi-Fi Network and Device for NOMA iQ™
How to Sync Google Assistant with NOMA iQ™
How to Sync Amazon Alexa with NOMA iQ™
How to Create, Edit or Delete a NOMA iQ™ Experience
How to Create, Edit or Delete NOMA iQ™ Device Groupings
Frequently Asked Questions
- General
- Router/Wi-Fi
- Basic Device Set Up
- Product Set Up & Info
- Privacy
GENERAL
- Download the NOMA iQ™ app from either the Google Play store or the Apple store
- Open the app and you will be prompted to create an account. Input your email, name, and create a password. A confirmation will then be sent to your email
- Once you confirm your account through the email link, log into the NOMA iQ™ app where you can then name your Household and enter your postal code (this is optional for weather conditions in your area)
- Confirm your time zone and you’re ready to go!
- Click the ‘Menu’ icon at the top left corner of the app
- Click ‘Account’ and scroll down to click ‘Change Password’
- Put in your ‘Current Password’, then add your new password, confirm, then hit save
NOMA iQ™ works with any mobile device running iOS 16.0 or higher, or Android 9 or higher.
All NOMA iQ™ products come with built-in DataGuard™ protection. This technology automatically detects, prevents, and responds to any cybersecurity issues. For further security, we recommend setting a strong password for your account and enabling the fingerprint sensor for login (if available on your device).
- In the Home page, select the device you want to restore to factory settings.
- Click on the ‘Menu’ icon
- Scroll down and click on ‘Delete’
- After clicking ‘Confirm,’ the device will be removed from the app and return to pairing mode
- Go into the Menu click ‘Account’
- Scroll to the bottom, click Delete ‘Account’ and confirm
ROUTER/ Wi-Fi
- On your mobile device go to Settings > Wi-Fi
- Look for your Wi-Fi network. If you see two or more networks, one of them may be a 2.4GHz band. 2.4GHz network names may end with 2.4 or 2.4G. (For example: "Home Wi-Fi 2.4GHz“). 5GHz network names may end with 5, 5G.
- If you don't see any network name associated with 2.4 or 5, you need to log in to your Wi-Fi router. Please refer to your router manual/documentation.
- In the App Store, download the app ‘AirPort Utility’
- In the AirPort Utility app, click on ‘Settings’
- Turn on ‘Wi-Fi Scanner’ and all the detected networks will appear in the menu
- Check the channel:
• Channel 1 – 13 band means you are on 2.4GHz
• Channel 13+ band means you are on 5GHz
- Enter the phone's ‘Settings’ page
- Tap ‘Network and Internet’
- Go into your connected Wi-Fi settings by tapping the settings icon
- Under ‘Frequency’ you can see what channel your phone is currently detecting
- Make sure your mobile device is running iOS 16.0 or higher, or Android 9 or higher.
- Verify your network and ensure your mobile device is connected to a 2.4 GHz Wi-Fi channel
- Install your smart product and make sure Bluetooth is enabled on your mobile device
- Login to the NOMA iQ™ app, select the “+” symbol on the top right-hand corner
- Select your smart product and follow the instructions within the app
- Make sure your mobile device is running iOS 16.0 or higher, or Android 9 or higher.
- Verify your network credentials and ensure your mobile device is connected to a 2.4 GHz Wi-Fi channel
- Make sure Bluetooth is enabled on your mobile device
- Make sure your NOMA iQ™ device is connected to power, turned on, and is in pairing mode
If you’re still having issues, please contact us at info@nomaiq.com
BASIC DEVICE SET UP
- Click the ‘+’ sign in the top right corner of the main page of the app
- The app will then scan for available products to pair – select the product you wish to pair and then input the password for your2.4GHz Wi-Fi network
- Ensure that your NOMA iQ™ device is powered and in pairing mode (lights are flashing) before proceeding
- Follow the rest of the instructions via the app for product set-up
- In the Home page, select the device you want to remove
- Scroll down and click on ‘Delete’
- Click on ‘Confirm’ and the device is now removed from your account
- Launch the Amazon Alexa App
- Click on the Menu icon
- Click on ‘Skills & Games’
- Click the Search icon
- Search for ‘NOMA iQ™’
- Click on ‘Enable to Use’
- Enter your NOMA iQ™ credentials and tap ‘Link Now’
- Click ‘Authorize’
- Click ‘Done’
- Click ‘Discover Devices’
- Use voice command, “Alexa, discover devices” to find your NOMA iQ™ devices
- Click ‘Set Up Device’ to set up your device
- Click ‘Done’
- The NOMA iQ™ account is now linked to Amazon Alexa
- Launch the Google Home app
- Tap the “+” button on the top left corner and tap ‘Set Up Device’
- Tap ‘Works with Google’ and search for ‘NOMA iQ™’
- Enter your NOMA iQ™ credentials to sign in
- Tap ‘Authorize’ to complete the account linking process
- If successfully integrated, you will see ‘NOMA iQ™ is linked’
- Google Assistant is now synced with the NOMA iQ™ app
- Click the ‘+’ sign to the right of ‘Experiences’ on the home page
- Pick what device(s) you want to include
- Pick what you want that device to do
- Pick what will trigger the experience
- Give your Experience a name and add a colour if you have a shortcut
- Go to the ‘Experiences’ tab from the Home page
- Click the pencil icon next to the Experience you wish to edit.
Actions will run at the specified time on the specified day.
Example: Lights will turn on at 9pm every weekday.
Countdown Trigger
Actions will run at the end of a countdown which starts when you click the relevant shortcut.
Example: Lights will turn on 5 minutes after pressing the “Lights on” shortcut.
Sunrise/Sunset Trigger
Actions will run at Sunrise or Sunset; whatever time that is, based on location and the time of year.
Example: Lights will turn on at Sunset. In June, that will be 8pm, in December that will be 4pm.
Shortcut Trigger
Action will execute when the relevant shortcut is clicked.
Example: Lights will turn on when I press the “Lights on” Shortcut.
Schedule Trigger
Actions will run at the start time on the specified days. At the end time, devices will return to their prior state.
Example: Lights will turn on at 9pm every Friday and revert to what they were before at 12pm the next day.
Note: At the end of a Schedule Experience, included devices will revert to the state they were in when the Experience was created. For best results, please ensure that your devices are in the desired ‘end state’ when you build the Experience. Example: If I want the lights to turn on at 9pm and off at 11pm, the lights should be off when creating the Experience.
- In the Home page, select one of the devices you want to create a group with
- Click on the Menu icon
- Click on ‘Device Grouping’
- Select the devices you want to group and click on ‘Confirm’
- Enter a Group Name
- Click on ‘Save’
- The Device Group is now created
- The new group can be found in the Home page
- In the Home page, select the Menu icon
- Click on ‘Members,’ then add member
- You will be prompted to add a device before sharing. If there are no devices in the Household, you will not able to share.
- Ask your friend/family member to download the NOMA iQ™ app and sign up for an account
- Ensure they choose ‘Join a Household’
- Once they’ve tapped ‘Join a Household,’ return to your NOMA iQ™ app and click ‘Next’
- The devices in the Household are now shared
PRODUCT SET-UP: Light Bulb/Light Strip
- Verify your Wi-Fi network and ensure your mobile device is connected to a 2.4 GHz Wi-Fi channel
- Install your smart light bulb in a light fixture and turn the light fixture ON
- If the bulb is flashing, continue to step 4. Otherwise set it to pairing mode by cycling the light ON/OFF about 4-5 times with 1-2 second intervals in between ON and OFF.
- Make sure Bluetooth and Locations Services is enabled on your mobile device
- In the NOMA iQ™ app, select the ‘+’ symbol on the top right-hand corner to add the device
- Select the smart light bulb and follow the prompts in the app
- Verify your Wi-Fi network and ensure your mobile device is connected to a 2.4 GHz Wi-Fi channel
- Plug in your smart light strip and turn it ON
- If the light strip is flashing, continue to step 4. Otherwise set it to pairing mode by pressing and holding the power button for 3-4 seconds until it starts flashing.
- Make sure Bluetooth and Locations Services is enabled on your mobile device
- In the NOMA iQ™ app, select the “+” symbol on the top right-hand corner to add the device
- Select the smart light strip and follow the prompts in the app
- In the Home page, select the smart bulb/ light strip you want to restore to factory settings
- Click on the Settings icon
- Scroll down and click on 'Delete Device'
- Select 'Confirm'
- The device is now removed and in pairing mode
1. Install your NOMA iQ™ smart light bulb into the fixture you wish to use it in.
2. Turn on the light on for 1 second and off for 1 second, 5 times.
3. Your light bulb will flash on and off to indicate it’s in pairing mode
4. Open the NOMA iQ™ app on your mobile device and click the plus ‘+’ icon at the top right corner of the home screen to pair the device
1. Connect the power cord to the corresponding port on the controller
2. Connect the light strip to the square connector on the controller
3. Plug the power cord into an electrical outlet
4. Press and hold the button on the controller for 3-4 seconds
5. The light strip will flash on and off to indicate that it’s in pairing mode
6. Open the NOMA iQ™ app on your mobile device and click the plus ‘+’ icon at the top right corner of the home screen to pair the device
PRODUCT SET-UP: Power Bar/Wall Plug/Outdoor Plug
- Verify your Wi-Fi network and ensure your mobile device is connected to a 2.4 GHz Wi-Fi channel
- Plug in your smart power bar and turn it ON
- If the indicator light is flashing, please skip to step 4. Otherwise, to put the device into pairing mode, press and hold the power button for plugs (reset button for power bar) for 3-5 seconds until the light starts flashing.
- Make sure Bluetooth and Location Services is enabled on your mobile device
- In the NOMA iQ™ app, select the “+” symbol on the top right-hand corner to add the device
- Select the smart power bar/plug and follow the prompts in the app
- Unplug the wall plug/outdoor plug for 10 seconds
- Plug the unit back in and check to see if the power indicator turned on
- Also try moving the wall plug/ outdoor plug to other outlets to see if the indicator light turns on
- Plug your NOMA iQ™ smart wall plug into an electrical outlet
- Press and hold the power button on the side of the plug for 3-5 seconds
- The power button will flash on and off to indicate the device is in pairing mode
- Open the NOMA iQ™ app on your mobile device and click the plus ‘+’ icon at the top right corner of the home screen to pair the device
- Plug your NOMA iQ™ smart outdoor plug into an electrical outlet
- Press and hold the power button for 3-5 seconds
- The indicator light will flash on and off to indicate the device is in pairing mode
- Open the NOMA iQ™ app on your mobile device and click the plus ‘+’ icon at the top right corner of the home screen to pair the device
- Plug your NOMA iQ™ smart power bar into an electrical outlet
- Press the switch to turn on the power bar and the power indicator light will also illuminate
- Press and hold the reset button for 3-5 seconds
- The indicator light will flash on and off to indicate the device is in pairing mode
- Open the NOMA iQ™ app on your mobile device and click the plus ‘+’ icon at the top right corner of the home screen to pair the device
PRODUCT SET UP: Air Purifier
- Verify your Wi-Fi network and ensure your mobile device is connected to a 2.4 GHz Wi-Fi channel
- Plug in your smart air purifier and turn it ON
- Press and hold the power and Wi-Fi button until you hear 5 consecutive slow beeps to put it into pairing mode
- Make sure Bluetooth and Location Services is enabled on your mobile device
- In the NOMA iQ™ app, select the ‘+’ symbol on the top right-hand corner to add the device
- Select the air purifier and follow the prompts in the app
- For further troubleshooting, please refer to the manual
- Plug your NOMA iQ™ smart air purifier into an electrical outlet
- Press and hold the power and Wi-Fi buttons simultaneously until you hear 5 beeps
- The Connected icon will flash on and off to indicate the device is in pairing mode
- Open the NOMA iQ™ app on your mobile device and click the plus ‘+’ icon at the top right corner of the home screen to pair the device
PRODUCT SET UP: Dehumidifier
· Plug in your dehumidifier and turn it on
· Press and hold both the “MODE” and “FAN” button until the display on the control panel shows “P2” indicating that the device is in pairing mode
· Make sure Bluetooth and Location Services is enabled on your mobile device
· In the NOMA iQ™ app, select the ‘+’ symbol on the top right-hand corner to add the device
· Select the dehumidifier and follow the prompts in the app
· For further troubleshooting, please refer to the manual
· Continuous: the dehumidifier will operate continuously. The Fan Speed can be adjusted. The Desired Humidity cannot be adjusted. The LED display will show the room humidity level.
· Manual Set: the dehumidifier will operate at the selected fan speed and desired humidity. If the humidity level of the room is higher than the desired humidity setting, the compressor will turn on. If the humidity level of the room is lower than the desired humidity setting, the compressor will turn off.
· Turn off the dehumidifier
· Dust the side grille with a soft brush or the dusting attachment of your vacuum cleaner.
· Note: Have an authorized service technician clean and service the interior coils of your product annually.
Water Bucket:
· Every few weeks, rinse the inside of the water bucket with a mild detergent to avoid growth of mould, mildew and bacteria.
To empty your dehumidifier:
· Grasp the bucket sides and slide back to remove the bucket from dehumidifier
· Grasp the handle and bottom of the bucket to lift bucket
· Pour water through opening into a sink or tub
· Snap down the handle and reinstall the bucket
Note: If the Empty Bucket light comes on the dehumidifier will not operate. Empty or adjust bucket.
· You will need a surface strong enough to support the dehumidifier when its bucket is full of water
· Keep all outside doors, windows and other openings closed when you are operating the dehumidifier. Humid outdoor air will increase the dehumidifier’s workload.
· Install the dehumidifier in an area where the temperature will not fall close to 38°F or 3.3°C. Lower temperatures will cause performance to drop.
· Do not block the louvres of the unit.
Never operate this dehumidifier in an area that is likely to accumulate standing water. If this condition develops, for your safety disconnect the power supply before stepping into the water.
GROW BULBS
Yes.
Yes.
Dual Spectrum means that the light has two modes and is capable of providing the necessary spectrum for the growing stage along with the flowering stage.
Dual Spectrum means that the light has two modes and is capable of providing the necessary spectrum for the growing stage along with the flowering stage.
The light modes are Growing and Flowering. The Growing mode produces light focused in the blue spectrum and is used by plants during their growing and vegetative periods. The Flowering mode produces light focused in the red spectrum, which will help encourage flowering and fruiting of your plants.
1. Verify your Wi-Fi network and ensure your mobile device is connected to a 2.4 GHz Wi-Fi network.
2. Install your smart grow light bulb in a light fixture and turn the light fixture ON.
3. If the bulb is flashing, continue to step 4. Otherwise set it to pairing mode by cycling the light ON/OFF about 4-5 times with 1-2 second intervals in between ON and OFF.
4. Make sure Bluetooth® and Locations Services are enabled on your mobile device.
5. In the NOMA iQ™ app, select the (+) symbol on the top right hand corner to add the device.
6. Select the smart grow light bulb and follow the prompts in the app.
1. Verify your Wi-Fi network and ensure your mobile device is connected to a 2.4 GHz Wi-Fi network.
2. Plug your smart grow light into an outlet and turn the light switch ON.
3. If the light is flashing, continue to step 4. Otherwise set it to pairing mode by cycling the switch ON/OFF about 4-5 times with 1-2 second intervals in between ON and OFF.
4. Make sure Bluetooth® and Locations Services are enabled on your mobile device.
5. In the NOMA iQ™ app, select the (+) symbol on the top right hand corner to add the device.
6. Select the smart grow light and follow the prompts in the app.
You can connect up to 7 units together. Maximum length should be 5' (1.5 m) or less.
The A19 bulb has a beam angle of 150 degrees, while the BR30 has a beam angle of 110 degrees. A beam angle of a lamp is the angle at which the light is distributed or emitted.
Yes, the A19/BR30 bulbs can be used in regular household lamps if they're used for plants.
The colour of the light has an amber/pink look to it.
The light colour temperature is 2200 Kelvins.
AIR CONDITIONERS (GENERAL)
A BTU is a British Thermal Unit, and it's a measure of how much energy your air conditioner uses to remove heat from your home in one hour.
Using the NOMA iQ™ app, you can control the Temperature Settings, Fan Speed and Swing of your Portable AC.
Using the NOMA iQ™ app, you can control the Temperature Settings and Fan Speed Settings of your Window AC.
Yes, you can pair multiple ACs to your mobile app. You can create a Group and add your ACs to the Group in order to control multiple ACs at a time.
NOMA iQ™ app allows you to create automated schedules or routines through a feature called Experiences. You can configure Experiences to run your ACs during your desired custom schedules (ex: every weekday from 11:00 p.m. to 7:00 a.m.) with the desired AC settings (Temperature, Fan Speed, etc.).
Yes, you can pair your ACs to Google Assistant and Amazon Alexa and control the ACs using your voice.
To pair your ACs to these Voice Assistants, open the NOMA iQ™ app, click on the Voice Assistants option in the Menu on the top left corner and follow the instructions in the app.
Once paired, you can control your ACs using your voice.
PORTABLE AIR CONDITIONER
In the event of a power outage, the device will automatically restart to its original state once power is restored.
The highest temperature that can be set is 30°C (86°F), and the lowest temperature that can be set is 16°C (60°F).
Please refer to the User Manual for instructions on how to store your portable air conditioner unit.
1. Drain the water completely. See "Draining the Air Conditioner“ in User Manual.
2. Run the air conditioner set to Fan Only for approximately 12 hours to dry the air conditioner.
3. Unplug the air conditioner.
4. Remove the flexible exhaust hose and store with the air conditioner in a clean, dry area. See "Installation Instructions".
5. Remove the window kit and store with the air conditioner in a clean, dry area. See "Installation Instructions".
6. Remove the filter and clean. See "Cleaning the Air Filter".
7. Clean the outside of the air conditioner. See "Cleaning the Outside".
8. Reinstall the filter.
9. Remove the batteries and store the remote control with the air conditioner upright in a clean, dry area.
Check the filter every 2 weeks to see if it needs cleaning.
Note: Do not operate the air conditioner without a filter in place.
1. Turn off the air conditioner.
2. Open the upper and lower back panels. Grasp the centre of the filter and pull it up and out.
3. Clean the air filter with a vacuum cleaner. If the air filter is very dirty, clean it in warm water with a mild detergent. Do not clean the air filter or use any chemical cleaner in the dishwasher. Thoroughly air dry the filter before replacement to ensure maximum efficiency.
4. Install the air filter back into the air conditioner and close the upper and lower back panels.
SACC stands for Seasonal Adjusted Cooling Capacity and is the standard for portable air conditioners. It is a rating in BTU/hour that represents the weighted average performance of a portable AC in a number of test conditions, some of which may be more extreme than the average use case, which is then adjusted to account for the effect of infiltration air and duct heat transfer.
Previously, portable ACs were rated similarly to other styles of air conditioners using the ASHRAE standard. As there is a difference between stationary and portable units, SACC was introduced to better reflect the energy efficiency of each model. While the SACC BTUs are lower than the previous ASHRAE BTUs, the models remain unchanged.
1. Fan: Only the fan runs without cooling. The fan speed can be adjusted from low, medium and high.
2. Dry: Dries the room to reduce the humidity. The AC automatically selects the temperature and low fan speed.
3. Cool: Cools to reduce the room temperature. The fan speed can be adjusted from low, medium or high.
It is entirely normal for your air conditioning unit to produce a little bit of water during routine functioning. This water is stored in the portable AC’s water tank. If you notice water dripping out of your portable AC, please ensure that the drain plugs are properly sealed/plugged.
1. Initial Setup
When the device is first plugged in, the display will show “77” indicating that the unit is in pairing mode (if it is not displaying “77”, please go to step 5). In order to pair the device, please enable and give permission for Locations Services and Bluetooth on your mobile device. In the NOMA iQ app, select the “+” symbol in the top right hand corner. Select the device and follow the instructions within the app.
2. Pre-Connected Network
If any pre-connected WiFi network is found, the device will connect automatically and the device status in the NOMA qi app will be updated.
3. No Pre-Connected Network
If no pre-connected WiFi network is found, make sure the device is in pairing mode (see step 5). Once connected, the device status in the NOMA iQ app will be updated.
4. No Network Found
If no WiFi network is found after 5 minutes during the pairing process, the WiFi function will automatically turn off and the display will show the room temperature. The unit can still be used with the control panel or remote control.
5. Reset WiFi Connection/Pairing Mode
To reset your WiFi connection or to set the device to pairing mode, press the "SWING" button on the remote control 6 times (each press will yield a beep). Wait 2 seconds for the display on the control panel to show "77" indicating that the device is in pairing mode. In order to pair the device, please enable and give permission for Locations Services and Bluetooth on your mobile device. In the NOMA iQ app, select the “+” symbol in the top right hand corner. Select the device and follow the instructions within the app.
6. No Cloud Connection
If the Cloud is down or WiFi signal drops, the device cannot connect to the cloud; the device status in the NOMA iQ app will show as offline.
7. Power Cycle or Outage
Once a connection has already been established, in the event of a power outage, the unit will restart once power is restored. If the unit is unplugged, plug the device back in and the device will connect to the pre-connected network. If the device has not been paired, upon power up it will go to Initial Setup (see Step 1).
NOTE: While the device is in pairing mode and the display shows “77”, the control panel display, buttons and LEDs will be inoperative for 5 minutes if unpaired. Please pair the device as mentioned in step 1, or if the device is to be used without smart control, please use the remote to control the device while ensuring it’s pointed at the receiver. After 5 minutes if unpaired, the display will show the room temperature and the device can be controlled by remote control or control panel.
*KEEP REMOTE IN A SECURE LOCATION AS IT’S REQUIRED FOR PAIRING.
WINDOW AIR CONDITIONER
It is recommended to store the window air conditioner indoors during the winter.
Check the filter every 2 weeks to see whether it needs cleaning.
NOTE: Do not operate the air conditioner without the filter in place.
1. Turn off the air conditioner.
2. Open the front panel. Grasp the centre of the filter and pull up and out.
3. Use a vacuum cleaner to clean the air filter. If the air filter is very dirty, wash it in warm water with a mild detergent. Do not wash the air filter in the dishwasher or use any chemical cleaners. Air dry the filter completely before replacing to ensure maximum efficiency.
4. Replace the air filter back into the air conditioner, and close the front panel.
Please refer to the User Manual for instructions.
1. Run the air conditioner set to Fan Only for approximately 12 hours to dry the air conditioner.
2. Unplug the air conditioner.
3. Remove all accessories and store with the air conditioner in a clean, dry area. See "Installation Instructions“ in User Manual.
4. Remove the filter and clean. See "Cleaning the Air Filter".
5. Clean the air conditioner. See "Cleaning the Front Panel".
6. Reinstall the filter.
7. Remove the batteries and store the remote control with the air conditioner upright in a clean, dry area.
The 10,000 and 12,000 BTU units have the same dimensions. The unit’s exterior dimensions are L x W x D 18 7/8 x 21 7/8 x 14 9/16"
(48 x 55.5 x 37 cm). The window dimensions should be at least larger than L x W: 18 7/8 x 21 7/8" (48 x 55.5 cm).
Yes, it's normal for water to be dripping outside.
The filter can be found in the front panel.
The highest temperature that can be set is 30°C (86°F), and the lowest temperature that can be set is 16°C (60°F).
The serial number can be found on a label on the window AC unit. The label is located on the top of the AC unit.
In the event of a power outage, the device will automatically restart to its original state once power is restored.
1. Fan: Only the fan runs without cooling. The fan speed can be adjusted from low, medium and high.
2. Dry: Dries the room to reduce the humidity. The AC automatically selects the temperature and low fan speed.
3. Cool: Cools to reduce the room temperature. The fan speed can be adjusted from low, medium or high.
4. Eco: Eco cools the room while saving energy. This mode slowly runs your AC compressor, which reduces the pressure in the condenser and allows the motor to consume less energy to run the unit.
When the device is plugged in, the WiFi LED will flash slowly indicating that the unit is in pairing mode. In order to pair the device, please enable and give permission for Locations Services and Bluetooth on your mobile device. In the NOMA iQ app, select the “+” symbol in the top right hand corner. Select the device and follow the instructions within the app.
2. Pre-Connected Network
If any pre-connected WiFi network is found, the device will connect automatically and the WiFi LED will remain lit.
3. No Pre-Connected Network
If no pre-connected WiFi network is found, make sure the device is in pairing mode (see step 5). Once connected, the WiFi LED will remain lit.
4. No Network Found
If no WiFi network is found after 5 minutes during the pairing process, the WiFi function will automatically turn off and the WiFi LED will turn off. The unit can still be used with the control panel or remote control.
5. Reset WiFi Connection/Pairing Mode
To reset your WiFi connection or to set the device to pairing mode, press and hold the "CONNECT" icon on the control panel until the WiFi LED starts flashing indicating that the device is in pairing mode. In order to pair the device, please enable and give permission for Locations Services and Bluetooth on your mobile device. In the NOMA iQ app, select the “+” symbol in the top right hand corner. Select the device and follow the instructions within the app.
6. No Cloud Connection
If the Cloud is down or WiFi signal drops, the device cannot connect to the cloud; the WiFi LED will turn off.
7. Power Cycle or Outage
Once a connection has already been established, in the event of a power outage, the unit will restart once power is restored. If the unit is unplugged, plug the device back in and the device will connect to the pre-connected network. If the device has not been paired, upon power up it will go to Initial Setup (see Step 1).
PRODUCT SET-UP: Garage Door Openers
- Set a strong password for your NOMA iQ™ account and enable biometric login (fingerprint or face detection) if available on your mobile device.
- If you use voice control for your Garage Door Opener, please use a strong Voice PIN that is not easily guessed.
- Keep your Garage Door Opener connected to Wi-Fi to receive the latest Firmware updates.
- Keep the NOMA iQ™ app updated to the latest version.
- Enable notifications for the NOMA iQ™ app and the Garage Door Opener. This will allow you to monitor activities and get alerted when your garage door is opened or closed.
PRODUCT SET-UP: Home Safety Sensors
Remove the holder from the main body. Twist the top half of the sensor counterclockwise. Once the casing is off, remove the small plastic tab on the battery terminal. The battery will be connected, and the sensor will automatically be in pairing mode.
If not in pairing mode, press and hold the power/reset button for 5 seconds until it flashes slowly. Then release the button and the sensor will enter pairing mode. To pair the device, please enable and give permission for Location Services and Bluetooth on your mobile device. In the NOMA iQ™ app, select the “+” symbol in the top right-hand corner. Select the device and follow the instructions within the app. Please ensure that notifications are turned on in the NOMA iQ™ app in the device settings.
When selecting your mounting location, ensure the surface area is clean. During the mounting process, ensure the metal contacts on the probe are facing downwards. Remove the holder from the main body. Select your location and mount the holder using the included screw and wall anchor or using the adhesive mount. Once installed, insert the main body and plug in the probe. Once the main body has been placed in its intended location, place the probe where a potential leak may occur.
Window/Door Sensor:
When selecting your mounting location, ensure the surface area is clean. During the mounting process, ensure that both the main and secondary sensors are aligned correctly. Use the alignment lines indicated on the main and secondary sensors. The sensors must be placed as close together as possible for them to work optimally. Before final assembly, please ensure you’re receiving notifications with the sensors roughly in place while opening and closing the window/door. Place the included adhesive tape on the back of the main and secondary sensors. Select your location and mount the main and secondary sensors. Once mounted, please ensure the sensor is working as intended. When the window/door is opened or closed, the LED on the sensor will momentarily light up and you should receive a notification on your mobile phone (please ensure notifications are turned on in the NOMA iQ™ app in the device settings).
Remove the cover, then press and hold the power/reset button for 5 seconds until it flashes slowly. Then release the button and the sensor will enter pairing mode. To pair the device, please enable and give permission for Location Services and Bluetooth on your mobile device. In the NOMA iQ™ app, select the “+” symbol in the top right-hand corner. Select the device and follow the instructions within the app.
Window/Door Sensor:
Remove the front cover from the casing, then press and hold the power/reset button for 5 seconds until it flashes rapidly. To pair the device, please enable and give permission for Location Services and Bluetooth on your mobile device. In the NOMA iQ™ app, select the “+” symbol in the top right-hand corner. Select the device and follow the instructions within the app.
Water Leak Sensor:
Remove the holder from the main body. Twist the top half of the sensor in a counterclockwise rotation. Remove the spent battery and place 1x CR2-3V battery into the battery compartment, correctly observing the polarity indications (+/-). Replace the top half of the sensor by rotating it clockwise.
Window/Door Sensor:
Push the button while holding the main sensor and slide the casing upward. Remove the spent battery and place 1x CR123A-3V battery into the battery compartment, correctly observing the polarity indications (+/-). Replace the battery compartment cover.
PRODUCT SET UP: Ceiling Fans
1. Verify your Wi-Fi network and ensure your mobile device is connected to a 2.4 GHz Wi-Fi channel.
2. Install the ceiling fan and power it on from the switch. Ensure that the ceiling fan and light are responding to the remote control.
3. Press and hold the power and light buttons on the remote simultaneously for 5 seconds, until you hear the fan beep twice.
4. Once the fan beeps twice, it can be added to the NOMA iQ™ app. Make sure Bluetooth and location services are enabled on your mobile device.
5. In the NOMA iQ™ app, select the ‘+’ symbol on the top right-hand corner and select 'Add New Device.'
6. Select the ceiling fan and light and follow the prompts in the app.
For further troubleshooting, please refer to the manual.
1. Plug in your NOMA iQ™ smart ceiling fan and light into an electrical outlet.
2. Press and hold the power and light buttons on the remote simultaneously for 5 seconds, until you hear the fan beep twice.
3. Once the fan beeps twice, it can be added to the NOMA iQ™ app.
Yes, your ceiling fan's direction can be controlled by voice commands. You can find this guidance in the NOMA iQ™ app as well.
Your ceiling fan's direction can be changed by the respective buttons on the remote, controls in the NOMA iQ™ app, and by using voice assistant commands.
PRODUCT SET-UP: Humidifiers
When the device is plugged in and turned on, press and hold the Wi-Fi button until the Wi-Fi LED starts single-flashing, indicating that the unit is in pairing mode. To pair the device, please enable and give permission for Locations Services and Bluetooth on your mobile device. In the NOMA iQ app, select the “+” symbol in the top right-hand corner and select ‘Add New Device’. Select the device and follow the instructions within the app.
02. Pre-Connected Network
If any pre-connected Wi-Fi network is found, the device will connect automatically, and the Wi-Fi LED will stay lit.
03. No Pre-Connected Network
If no pre-connected Wi-Fi network is found, make sure the device is in pairing mode (see step 5). Once connected, the Wi-Fi LED will remain lit.
04. No Network Found
If no Wi-Fi network is found after 5 minutes during the pairing process, the Wi-Fi function will automatically turn off and the Wi-Fi LED will turn off. The unit can still be used with the control panel.
05. Reset Wi-Fi Connection/Pairing Mode
To reset your Wi-Fi connection or to set the device to pairing mode, press and hold both the Wi-Fi button and the POWER button on the control panel until the Wi-Fi LED starts single-flashing, indicating that the device is in pairing mode. To pair the device, please enable and give permission for Locations Services and Bluetooth on your mobile device. In the NOMA iQ app, select the “+” symbol in the top right-hand corner and select ‘Add New Device’. Select the device and follow the instructions within the app.
06. No Cloud Connection
If the cloud service is down or Wi-Fi signal drops, the Wi-Fi LED will double-flash indicating the device cannot connect to the cloud. Once the connection is restored, the Wi-Fi LED will remain lit.
07. Power Cycle or Outage
Once a connection has already been established, in the event of a power outage, the unit will restart once power is restored and automatically connect to the pre-connected Wi-Fi network. If the unit is unplugged, plug the device back in and the device will connect to the pre-connected network.
PRIVACY
Both Android and iOS platforms require location permissions during the onboarding of a smart home device. This is mandated by the mobile operating system, not the NOMA iQ™ app. Location services help ensure precise device discovery by enhancing Bluetooth and Wi-Fi detection.
Need More Help?
Call Us
For the quickest service, reach us at 1-844-586-4662 between 8 a.m. to 9 p.m. EST.
Online Chat
Chat with a customer representative online using the live chat feature between 8 a.m. to 9 p.m. EST. A representative will respond as soon as possible.
Disclaimers:
Apple App Store, iPhone are trademarks of Apple Inc., registered in the U.S. and other countries.
The Bluetooth® word mark and logos are registered trademarks owned by Bluetooth SIG, Inc. and any use of such marks by Shenzhen Hs Joint Technology Co., Ltd. Is under licence. Other trademarks and trade names are those of their respective owners.
Google Play, Google Home and Android are registered trademarks of Google LLC
Amazon, Alexa and all related logos are trademarks of Amazon.com, Inc. or its affiliates.
All other trademarks are the property of their respective owners
A simple and convenient solution for those who are new to smart home with added depth of control for more advanced users. With DataGuard™ cybersecurity built into all NOMA iQ™ products, you can enjoy your smart home with confidence.
NOMA iQ™
A simple and convenient solution for those who are new to smart home with added depth of control for more advanced users. With DataGuard™ cybersecurity built into all NOMA iQ™ products, you can enjoy your smart home with confidence.