Save up to 25%* during the Biggest Tire Sale of the Year*
Shop NowTriangle Rewards Members get FREE Local Shipping on eligible Ship to Home orders over $99!
Sign In or Join🎄🎁 Christmas starts here. Discover festive favourites, from trees and lights to decor and more. 🎄🎁
Shop NowTriangle Rewards Members get FREE Local Shipping on eligible Ship to Home orders over $99!


Deals
New & Featured
Departments
- Automotive
- ATVs, Snowmobiles, Motorcycles Parts & Accessories
- ATVs, Snowmobiles, Motorcycles Parts & Accessories Sales
- ATVs, Snowmobiles, Motorcycles Parts & Accessories Clearance
- ATV & UTV Parts & Accessories
- Loading Ramps
- Motorcycle Parts & Accessories
- Snowmobile Parts & Accessories
- Trailers & Towing Accessories
- Audio & Electronics
- Auto Body Repair, Paints & Accessories
- Auto Lighting
- Auto Parts
- Auto Body Parts
- Brakes
- Drivetrain & Transmission
- Electrical & Wiring
- Emission & Exhaust Systems
- Engine & Ignition
- Code Readers, Diagnostic & Test Tools
- Distributors, Caps, Rotors & Parts
- Drive Belts, Tensioners & Harmonic Balancers
- Engine & Ignition Sensors & Switches
- Engine & Transmission
- Engine Gaskets
- Gauges & Fittings
- Glow Plugs & Components
- Ignition Coils, Resistors & Control Modules
- Ignition Wires & Sets
- Intake Manifolds
- Oil Delivery Parts
- Spark Plugs
- Timing Belts & Kits
- Filters & PCV Valves
- Fuel Delivery
- Heating, A/C & Engine Cooling
- Antifreeze & Coolant System Additives & Chemicals
- Cabin Air Filters
- Engine Coolant Temperature Sensors & Switches
- Engine Cooling Parts
- Engine Heaters
- Heating & A/C Parts
- Heating, A/C & Engine Cooling Tools
- Refrigerants & A/C Additives
- Oil Delivery Parts
- Performance Parts
- Starters & Alternators
- Steering & Alignment
- Suspension Parts
- Wiper Blades & Parts
- Auto Shelters
- Auto Tools
- Auto Body Repair Tools
- Brake System Tools
- Buffers & Polishers
- Diagnostic & Testing Tools
- Drivetrain & Transmission Tools
- Electrical Tools & Kits
- Fuel System Tools
- Garage & Auto Shop Storage & Equipment
- General Service Tools
- Grease & Lubrication Tools
- Heating, A/C & Engine Cooling Tools
- Oil Change Tools & Accessories
- Portable Work Lights
- Repair Manuals
- Steering, Suspension & Alignment Tools
- Tire & Wheel Tools
- Tire Repair Materials
- Batteries, Maintenance & Accessories
- Auto & Specialty Batteries
- Battery Booster Packs & Jump Starters
- Battery Cables & Hold Downs
- Battery Chargers
- Battery Terminals
- Battery Testers & Tools
- Booster Cables
- EV Chargers
- Power Inverters
- Car Detailing & Care Products
- Car Safety & Security
- Exterior Accessories
- Interior Accessories
- 12V Car Chargers & Plug-In Accessories
- Car Air Fresheners
- Car Safety & Security
- Car Seats
- Car Warmers
- Car Window Shades & Visors
- Car Window Tint
- Floor Mats & Liners
- Interior Car Mirrors
- Interior Car Organizers
- Interior Dress-Up Accessories
- Keychains
- Seat Covers & Cushions
- Steering Wheel Covers
- Oils, Fluids, Additives & Chemicals
- Antifreeze & Coolant System Additives & Chemicals
- Brake & Power Steering Fluids & Additives
- Diesel Fluids
- Engine Oils & Additives
- Fuel System Additives & Cleaners
- Grease, Gear Oils & Lubricants
- Oil Change Tools & Accessories
- Refrigerants & A/C Additives
- Stop Leaks
- Transmission Fluids & Additives
- Windshield Washer Fluids
- RV Parts & Accessories
- RV Electrical Accessories
- RV Exterior
- RV Fresh Water Accessories
- RV Interior
- RV Leveling & Stabilization
- RV Lighting
- RV Maintenance
- RV Plumbing & Sanitation
- Tires & Wheels
- Trailers & Towing Accessories
- Truck Accessories
- Cargo Management
- Exhaust Systems
- Exterior Truck Accessories
- Floor Mats & Liners
- LED Light Bars
- Light Pods & Utility Lights
- Lighting Accessories
- Mud Flaps & Splash Guards
- Performance Air Filters
- Running Boards & Steps
- Seat Covers & Cushions
- Snow Plows, Mounts & Accessories
- Tonneau Covers
- Trailers & Towing Accessories
- ATVs, Snowmobiles, Motorcycles Parts & Accessories
- Home
- Appliances
- Hair Care
- Heating, Cooling & Air Quality
- Irons & Steamers
- Kitchen Appliances
- Blenders & Juicers
- Breadmakers
- Carbonated Water Makers & Accessories
- Coffee Grinders
- Coffee Makers
- Cookers
- Espresso Machines & Makers
- Food Dehydrators
- Food Mixers & Accessories
- Food Processors & Choppers
- Frozen Treat Makers & Ice Cream Scoops
- Fryers
- Hot Plates & Food Warmers
- Ice Makers
- Indoor Grilling
- Kettles
- Meat Grinders & Slicers
- Microwaves
- Popcorn Makers
- Toasters
- Waffle Makers
- Portable Dishwashers & Replacement Parts
- Range Hoods & Accessories
- Refrigerators & Beverage Coolers
- Sewing Machines
- Shavers, Trimmers & Hair Removal
- Vacuum Cleaners
- Water Coolers
- Bath
- Bath Mats & Rugs
- Bathroom Accessories
- Bathroom Exhaust Fans & Accessories
- Bathroom Hardware
- Bathroom Storage & Organization
- Bathroom Vanities
- Bathtubs, Showers & Accessories
- Hand & Bath Towels
- Beauty, Health & Wellness
- Bath, Body & Skin Care
- Fitness & Exercise
- Fitness & Training Recovery
- Hair Care
- Health Care Devices & Accessibility Equipment
- Heating, Cooling & Air Quality
- Oral Care
- Protective Face Masks & Coverings
- Shavers, Trimmers & Hair Removal
- Spa, Massage & Aromatherapy
- Sun Protection
- Heating, Cooling & Air Quality
- Home Decor
- Home Electronics
- Audio Devices
- Cell Phone Accessories
- Computer Accessories
- Extension Cords
- Flashlights, Lanterns & Headlamps
- Home Electronics Accessories & Supplies
- Home Phones & Two Way Radios
- Household Batteries
- Power Bars & Surge Protectors
- Smart & GPS Watches
- Tablets & Tablet Accessories
- TV Stands & Media Units
- TV, Video & Home Theater
- Home Furniture
- Baby Furniture
- Bedroom Furniture
- Entryway Furniture
- Games Room
- Kitchen & Dining Room Furniture
- Living Room Furniture
- Office Furniture
- Patio Furniture & Décor
- Storage Furniture
- Toddler & Kids Furniture
- Window Treatments
- Home Safety & Security
- Household & Cleaning Supplies
- Air Fresheners
- Cleaners
- Cleaning Tools
- Dish Cleaning
- Drain Cleaners
- Floor Cleaning
- Garbage Cans & Bags
- Laundry Supplies
- Paper Products
- Plungers
- Vacuum Cleaners
- Kitchenware
- Bakeware
- Coffee, Espresso & Tea
- Cookware
- Dining & Entertaining
- Food Organizers
- Kitchen Appliances
- Blenders & Juicers
- Breadmakers
- Carbonated Water Makers & Accessories
- Coffee Grinders
- Coffee Makers
- Cookers
- Espresso Machines & Makers
- Food Dehydrators
- Food Mixers & Accessories
- Food Processors & Choppers
- Frozen Treat Makers & Ice Cream Scoops
- Fryers
- Hot Plates & Food Warmers
- Ice Makers
- Indoor Grilling
- Kettles
- Meat Grinders & Slicers
- Microwaves
- Popcorn Makers
- Toasters
- Waffle Makers
- Kitchen Linens
- Kitchen Storage & Organization
- Kitchen Tools & Gadgets
- Can & Bottle Openers
- Colanders, Strainers & Salad Spinners
- Cooking Thermometers
- Frozen Treat Makers & Ice Cream Scoops
- Kitchen Scales
- Kitchen Timers
- Kitchen Utensil Sets
- Mandolines & Graters
- Measuring Cups & Spoons
- Mixing Bowls
- Pizza Ovens & Tools
- Potato & Meat Mashers
- Rolling Pins
- Salt & Pepper Shakers
- Specialty Tools
- Utensils
- Knives & Cutting Accessories
- Portable Drinkware
- Lighting
- Moving Supplies
- Office & School Supplies
- Paints & Stains
- Party City
- Bakeware
- Balloons & Accessories
- Birthday Invitations & Valentine's Day Cards
- Gift Wrapping Supplies
- Household & Cleaning Supplies
- Party Decorations
- Party Favours
- Arts & Crafts Supplies
- Bags
- Bubbles & Bubble Toys
- Cups, Containers & Treat Boxes
- Favour Ties, Tags & Charms
- Giveaway Toys
- Glow Sticks
- Jewelry
- Party & Birthday Hats
- Party Favour Gift Sets
- Pins, Buttons & Patches
- Stationery
- Stickers
- Temporary Tattoos
- Trophies & Ribbons
- Wands
- Water Balloons
- Water Blasters & Soakers
- Whistle & Noisemakers
- Tableware
- Toys & Games
- Sinks, Faucets & Fixtures
- Bathroom Sinks & Faucets
- Bathroom Vanities
- Bathtubs, Showers & Accessories
- Kitchen Sinks & Faucets
- Laundry Tubs & Faucets
- Shower Wall Panels
- Showerheads & Hand Showers
- Toilets & Accessories
- Smart Home
- Snacks & Beverages
- Storage & Organization
- Baskets
- Bathroom Storage & Organization
- Closet Storage & Organization
- Garage Organization & Tool Storage
- Garage Door Openers & Hardware
- Garage Stools
- Garage Storage Cabinets
- Garage Storage Shelves & Racks
- Garage Wall & Ceiling Organization
- Plastic Storage Containers & Totes
- Portable Work Lights
- Tool Bags, Boxes & Organizers
- Tool Belts & Aprons
- Tool Chests, Cabinets & Accessories
- Tool Pouches & Holders
- Utility & Tool Carts
- Workbenches & Workstands
- Hanging Hooks
- Kitchen Storage & Organization
- Laundry Storage & Organization
- Shelving & Racks
- Shoe Racks & Storage
- Shopping Carts & Bags
- Storage Bins
- Storage Drawers & Carts
- Storage Furniture
- Toy Storage
- Vacuum Storage Bags
- Appliances
- Outdoor Living
- Backyard Pools & Supplies
- Christmas
- Christmas Entertaining
- Christmas Garlands
- Christmas Lights
- Christmas Stockings & Holders
- Christmas Storage
- Christmas Treats
- Christmas Tree Decorations
- Christmas Trees & Accessories
- Christmas Wreaths
- Festive Pets
- Gift Wrapping & Accessories
- Indoor Christmas Decor
- Outdoor Christmas Décor
- Pyjamas & Robes
- Gazebos, Pergolas & Canopies
- Generators & Accessories
- Halloween & Décor
- Animated Halloween Characters
- Halloween Candies & Chocolates
- Halloween Costumes & Accessories
- Indoor Fall & Halloween Decor
- Outdoor Halloween Décor
- Pumpkin Carving Kits & Accessories
- Lawn & Garden
- Mosquito, Insect & Pest Control
- Outdoor Cooking & BBQs
- Outdoor Dining & Entertaining
- Outdoor Heating
- Outdoor Lighting
- Outdoor Power Equipment
- Chainsaws
- Grass Trimmers
- Hedge Trimmers
- Lawn & Garden Batteries
- Lawn Mowers
- Lawn Tractors, Riding Mowers & Attachments
- Leaf Blowers & Accessories
- Log Splitters, Wood Chippers & Shredders
- Outdoor Power Tool Accessories
- Pressure Washers, Parts & Accessories
- Snowblowers
- Tillers & Cultivators
- Outdoor Recreation
- Outdoor Storage
- Patio Furniture & Décor
- Snow Removal Equipment & Tools
- Solar Power Systems
- Tools & Hardware
- Air Tools & Compressors
- Electrical
- Conduits & Fittings
- Cord Covers & Cable Organizers
- Dimmers, Switches & Timers
- Electrical Boxes
- Electrical Motor Parts
- Electrical Tools & Accessories
- Extension Cords
- Fuse Boxes & Circuit Breakers
- Household Batteries
- Plugs, Connectors & Adapters
- Power Bars & Surge Protectors
- Wall Plates & Outlet Covers
- Wall Receptacles
- Weatherproof Electrical Fittings
- Wiring & Cables
- Exterior Repair & Maintenance Supplies
- Garage Organization & Tool Storage
- Garage Door Openers & Hardware
- Garage Stools
- Garage Storage Cabinets
- Garage Storage Shelves & Racks
- Garage Wall & Ceiling Organization
- Plastic Storage Containers & Totes
- Portable Work Lights
- Tool Bags, Boxes & Organizers
- Tool Belts & Aprons
- Tool Chests, Cabinets & Accessories
- Tool Pouches & Holders
- Utility & Tool Carts
- Workbenches & Workstands
- Hand Tools
- Hardware
- Ladders & Scaffolding
- Paints & Stains
- Plumbing
- Power Tool Accessories
- Power Tools
- Buffers & Polishers
- Combo Kits
- Drill Presses & Lathes
- Drills & Accessories
- Grinders
- Heat Guns
- Impact Drivers
- Impact Wrenches
- Nailers & Staplers
- Oscillating Tools
- Planers & Joiners
- Rotary Tools
- Routers
- Sanders
- Saws
- Specialty Power Tools
- Shop Vacuums
- Sinks, Faucets & Fixtures
- Bathroom Sinks & Faucets
- Bathroom Vanities
- Bathtubs, Showers & Accessories
- Kitchen Sinks & Faucets
- Laundry Tubs & Faucets
- Shower Wall Panels
- Showerheads & Hand Showers
- Toilets & Accessories
- Welding & Soldering Tools
- Work Wear & Safety Gear
- Sports & Recreation
- Bikes & Accessories
- Camping & Hiking
- Camp Cooking
- Camping & Hiking Backpacks
- Camping Accessories
- Camping Electronics
- Camping Furniture
- Camping Lanterns & Lights
- Camping Mattresses
- Coolers
- Hunting Knives
- Mosquito, Insect & Pest Control
- Portable Outdoor Heaters
- Sleeping Bags
- Sun Protection
- Survival Accessories
- Tents & Shelters
- Trekking Poles & Hiking Sticks
- Clothing, Shoes & Accessories
- Apparel, Gloves & Glasses
- Clothing
- Fan Zone
- Hats, Gloves & Accessories
- Hunting Clothes & Apparel
- Mosquito & Bug Net Gear
- Pyjamas & Robes
- Rain Gear
- Shoes & Boots
- Snowmobile Riding Gear
- Wetsuits & Water Shoes
- Winter Apparel
- Work Wear & Safety Gear
- Fishing
- Fitness & Exercise
- Games Room
- Golf & Precision Sports
- Hockey
- Hunting
- Luggage & Suitcases
- Outdoor Recreation
- Racquet Sports
- Team Sports
- Baseball & Softball
- Basketball
- Cricket
- Curling
- Fan Zone
- Football
- Hockey
- Lacrosse
- Soccer
- Volleyball
- Water Sports & Boating
- Boating & Marine
- Canoe & Kayak Accessories
- Canoe, Kayak & Stand Up Paddle Board Carriers
- Canoes
- Kayaks
- Life Jackets/PFDs
- Paddles, Oars & Accessories
- Stand Up Paddle Boards & Accessories
- Sun Protection
- Swimming
- Tow Ropes & Accessories
- Towable Tubes & Accessories
- Wakeboards & Water Skis
- Water Toys & Floats
- Wetsuits & Water Shoes
- Winter Sports
- Curling
- Hockey
- Ice Skates
- Sledding
- Snow Goggles
- Snow Helmets
- Snowboards
- Snowshoeing
- Winter Apparel
- Tires & Wheels
- Kitchen & Dining
- Bakeware
- Coffee, Espresso & Tea
- Cookware
- Dining & Entertaining
- Food Organizers
- Kitchen Appliances
- Blenders & Juicers
- Breadmakers
- Carbonated Water Makers & Accessories
- Coffee Grinders
- Coffee Makers
- Cookers
- Espresso Machines & Makers
- Food Dehydrators
- Food Mixers & Accessories
- Food Processors & Choppers
- Frozen Treat Makers & Ice Cream Scoops
- Fryers
- Hot Plates & Food Warmers
- Ice Makers
- Indoor Grilling
- Kettles
- Meat Grinders & Slicers
- Microwaves
- Popcorn Makers
- Toasters
- Waffle Makers
- Kitchen Linens
- Kitchen Storage & Organization
- Kitchen Tools & Gadgets
- Can & Bottle Openers
- Colanders, Strainers & Salad Spinners
- Cooking Thermometers
- Frozen Treat Makers & Ice Cream Scoops
- Kitchen Scales
- Kitchen Timers
- Kitchen Utensil Sets
- Mandolines & Graters
- Measuring Cups & Spoons
- Mixing Bowls
- Pizza Ovens & Tools
- Potato & Meat Mashers
- Rolling Pins
- Salt & Pepper Shakers
- Specialty Tools
- Utensils
- Knives & Cutting Accessories
- Portable Drinkware
- Vacuum Cleaners
- Storage & Organization
- Baskets
- Bathroom Storage & Organization
- Closet Storage & Organization
- Garage Organization & Tool Storage
- Garage Door Openers & Hardware
- Garage Stools
- Garage Storage Cabinets
- Garage Storage Shelves & Racks
- Garage Wall & Ceiling Organization
- Plastic Storage Containers & Totes
- Portable Work Lights
- Tool Bags, Boxes & Organizers
- Tool Belts & Aprons
- Tool Chests, Cabinets & Accessories
- Tool Pouches & Holders
- Utility & Tool Carts
- Workbenches & Workstands
- Hanging Hooks
- Kitchen Storage & Organization
- Laundry Storage & Organization
- Shelving & Racks
- Shoe Racks & Storage
- Shopping Carts & Bags
- Storage Bins
- Storage Drawers & Carts
- Storage Furniture
- Toy Storage
- Vacuum Storage Bags
- Toys & Games
- Luggage & Suitcases
- Clothing, Shoes & Accessories
- Apparel, Gloves & Glasses
- Clothing
- Fan Zone
- Hats, Gloves & Accessories
- Hunting Clothes & Apparel
- Mosquito & Bug Net Gear
- Pyjamas & Robes
- Rain Gear
- Shoes & Boots
- Snowmobile Riding Gear
- Wetsuits & Water Shoes
- Winter Apparel
- Work Wear & Safety Gear
- Pet Care
- Baby
- Party City
- Bakeware
- Balloons & Accessories
- Birthday Invitations & Valentine's Day Cards
- Gift Wrapping Supplies
- Household & Cleaning Supplies
- Air Fresheners
- Cleaners
- Cleaning Tools
- Dish Cleaning
- Drain Cleaners
- Floor Cleaning
- Garbage Cans & Bags
- Laundry Supplies
- Paper Products
- Plungers
- Vacuum Cleaners
- Party Decorations
- Party Favours
- Arts & Crafts Supplies
- Bags
- Bubbles & Bubble Toys
- Cups, Containers & Treat Boxes
- Favour Ties, Tags & Charms
- Giveaway Toys
- Glow Sticks
- Jewelry
- Party & Birthday Hats
- Party Favour Gift Sets
- Pins, Buttons & Patches
- Stationery
- Stickers
- Temporary Tattoos
- Trophies & Ribbons
- Wands
- Water Balloons
- Water Blasters & Soakers
- Whistle & Noisemakers
- Tableware
- Toys & Games
- Shop Canadian
- All Brands
- Sales & Clearance
- Services & Gift Cards
- Halloween
- Animated Halloween Characters
- Halloween Candies & Chocolates
- Halloween Costumes & Accessories
- Indoor Fall & Halloween Decor
- Outdoor Halloween Décor
- Pumpkin Carving Kits & Accessories
- Christmas
- Christmas Entertaining
- Christmas Garlands
- Christmas Lights
- Christmas Stockings & Holders
- Christmas Storage
- Christmas Treats
- Christmas Tree Decorations
- Christmas Trees & Accessories
- Christmas Wreaths
- Festive Pets
- Gift Wrapping & Accessories
- Indoor Christmas Decor
- Outdoor Christmas Décor
- Pyjamas & Robes
- Tires
- Party City
- Book Auto Service

This paragraph should be hidden.

How to wrap a gift
A well-wrapped present adds an extra layer of thoughtfulness to birthdays, holidays and anniversaries, that helps make the gift feel even more meaningful. With a few simple techniques, some basic supplies and a little preparation, you can achieve clean, professional-looking results. Canadian Tire offers wrapping supplies, gift accessories and everyday essentials to help make gift wrapping easier from start to finish.
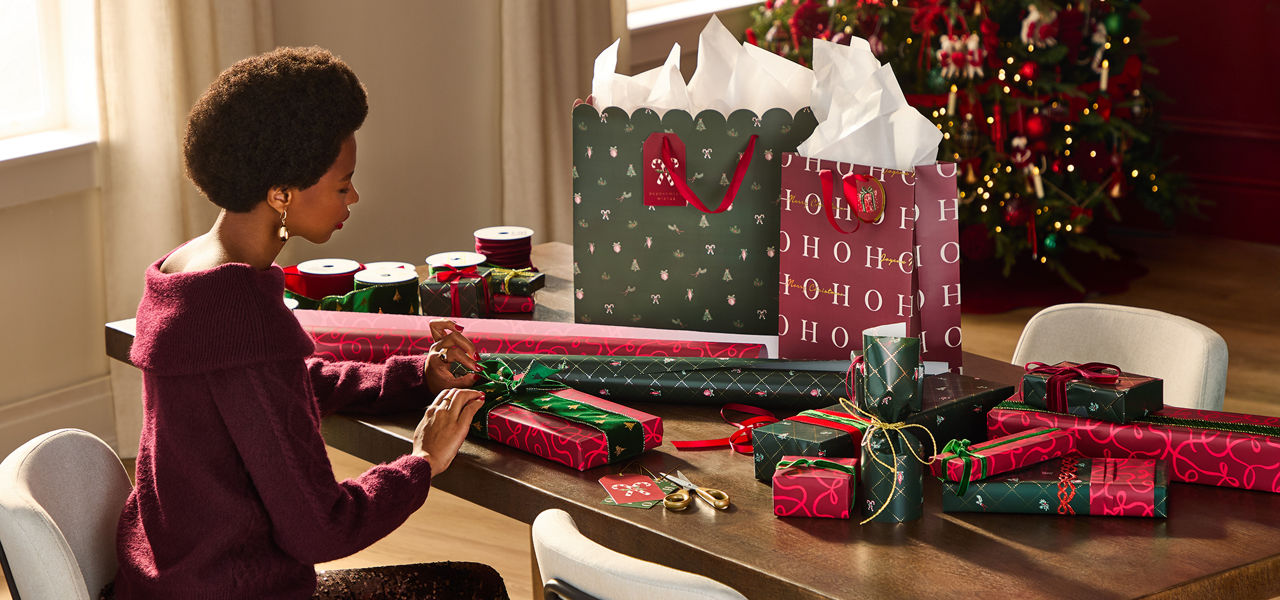
What you need to wrap a present
To wrap a present, you typically need wrapping paper, scissors, tape and a gift tag or card. Optional supplies include ribbon, bows, tissue paper, gift bags and decorative stickers for a more polished look. Choose wrapping materials that match the gift size and occasion to make wrapping easier and create a neat presentation.

Basic tools required
Most gift-wrapping projects require only a few basic supplies, and many households already have them on hand. While standard versions work well, using quality materials often helps create cleaner, more professional-looking results.
- Wrapping paper: Covers the gift and adds colour, style and personality that suits the chosen occasion.
- Scissors: Sharp scissors help create smooth, accurate cuts and reduce jagged edges that can affect the final appearance.
- Tape: Clear or double-sided tape secures folds, holds seams in place and keeps the wrapping tight.
- Flat work surface: A table, countertop, or desk provides enough space to measure, fold and wrap accurately while preventing wrinkles and tears.

Optional but helpful items
Decorative extras can improve the overall presentation and make certain gifts easier to wrap. These additions are particularly useful when you want a polished, gift-shop-quality finish.
Ribbon and bows: Add texture, colour and a decorative finishing touch.
Gift tags or labels: Help identify gifts while adding a personal element.
Double-sided tape: Conceals visible tape lines for a cleaner, seamless appearance.
Gift boxes and tissue paper: Help contain soft, delicate, or unusually shaped items while enhancing presentation and protection.

Tips before you start
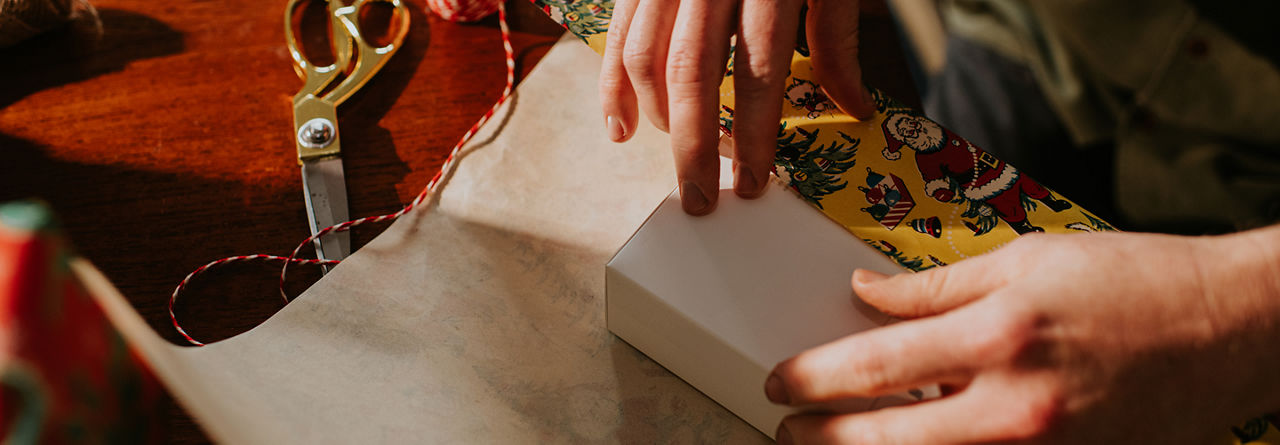
Taking a few minutes to prepare before wrapping a gift can make the entire process smoother and help you achieve better results. One of the most important considerations is choosing the correct amount of wrapping paper. Paper that is too large often creates bulky seams and excess material at the ends, while paper that is too small may not fully cover the gift. Before cutting, place the item on the paper and check that there is enough material to wrap around all sides with a small overlap.
For gifts that are soft, flexible, or irregularly shaped, consider using a gift box before wrapping. Clothing, plush toys, and other non-rigid items can be challenging to wrap neatly on their own. Placing them in a box creates clean edges and flat surfaces that make measuring, folding, and taping much easier. It can also help protect the contents during storage or transport.
Your workspace can significantly affect the final result. Wrapping gifts on a crowded, uneven, or dirty surface increases the risk of wrinkles, tears and crooked folds. Choose a large, clean, flat area where you can spread out the paper comfortably and move around the gift without restrictions. Good lighting can also help you align seams accurately and spot mistakes before they become difficult to fix.
Before securing any folds with tape, take time to smooth the wrapping paper with your hands. Flattening the paper helps remove creases, air pockets and wrinkles that can make even carefully wrapped gifts look uneven. A smooth starting surface makes it easier to create crisp edges and sharp corners throughout the process.
Another helpful tip is to prepare several small pieces of tape before you begin. Trying to pull tape from the roll while holding paper in place can be awkward and may cause folds to shift. Pre-cut tape strips allow you to work more efficiently and keep your focus on creating accurate folds and straight seams.
It's also smart to think about the size and shape of the gift before choosing your materials. Larger gifts may require wider paper rolls, while unusually shaped items may be better suited to gift bags or boxes. Planning ahead helps ensure you have the right supplies before you start.
Finally, organize all your materials within easy reach. Keeping your wrapping paper, tape, scissors, ribbons, and gift tags accessible reduces interruptions and makes the process feel more manageable. Simple preparation steps like these can save time, reduce frustration, and help you create neatly wrapped gifts for any occasion.
How to wrap a gift: step by step
Once your supplies are ready and your workspace is prepared, you can begin wrapping. Following a clear step-by-step process helps create cleaner folds, straighter seams, and a finished gift that looks polished and thoughtfully presented.
Step 1: Measure and cut the paper
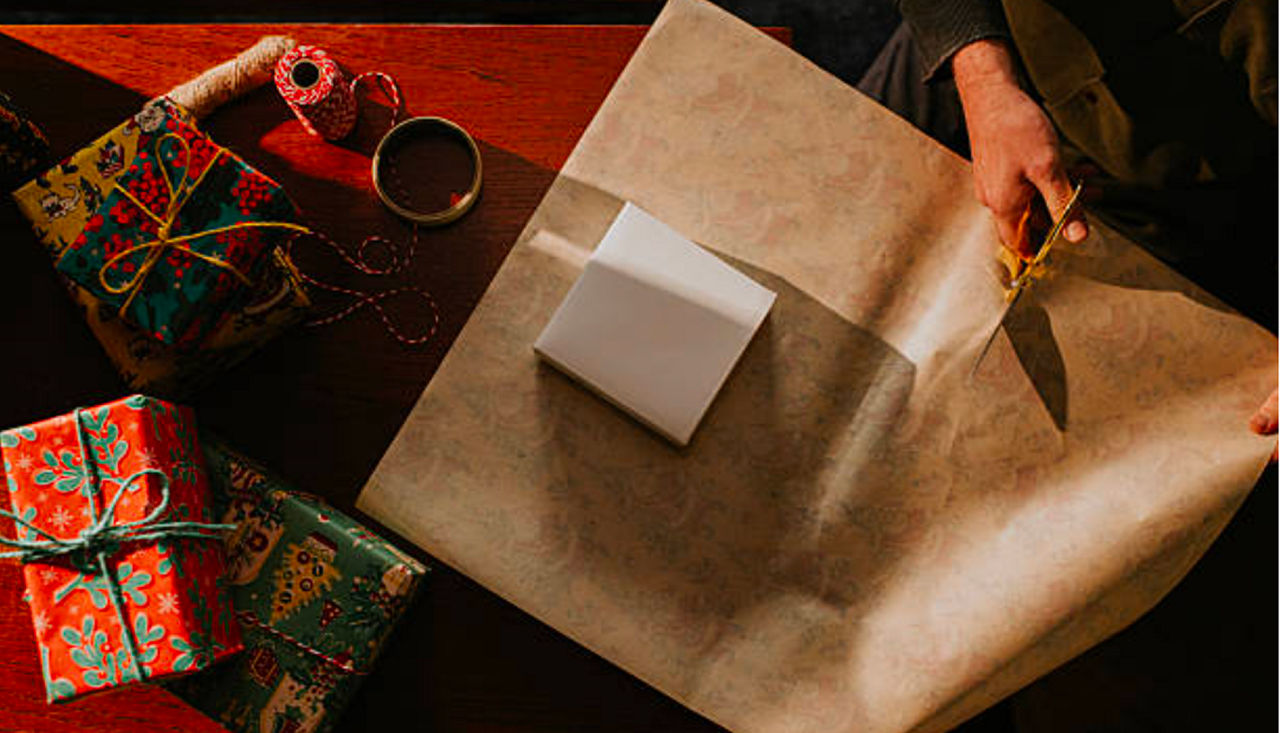
Place the gift face down on the wrapping paper and pull the paper around the box to estimate how much is needed. Leave a small overlap where the edges will meet but avoid using excessive material. Too much paper can create bulky folds that are difficult to manage, while too little paper may leave parts of the gift exposed. Once you're confident in the measurement, cut the paper as straight as possible for cleaner results later.
Step 2: Secure one side
Pull one side of the paper up and over the gift, ensuring the paper lies flat against the surface of the box. Keep the paper smooth and slightly taut to prevent wrinkles from forming during the wrapping process. Align the edge carefully so the seam remains straight and centered. Secure the paper with a small piece of tape, using only as much tape as needed to hold it firmly in place.

Step 3: Wrap the other side
Fold the exposed edge of the remaining paper inward by roughly one centimetre to create a clean, finished seam. Pull the paper tightly across the gift and align it carefully with the first edge before applying tape. Press the paper flat against the gift as you work to remove air pockets and minimize wrinkles. Taking extra care with this seam often has the biggest impact on the overall appearance of the wrapped gift.

Step 4: Fold the ends
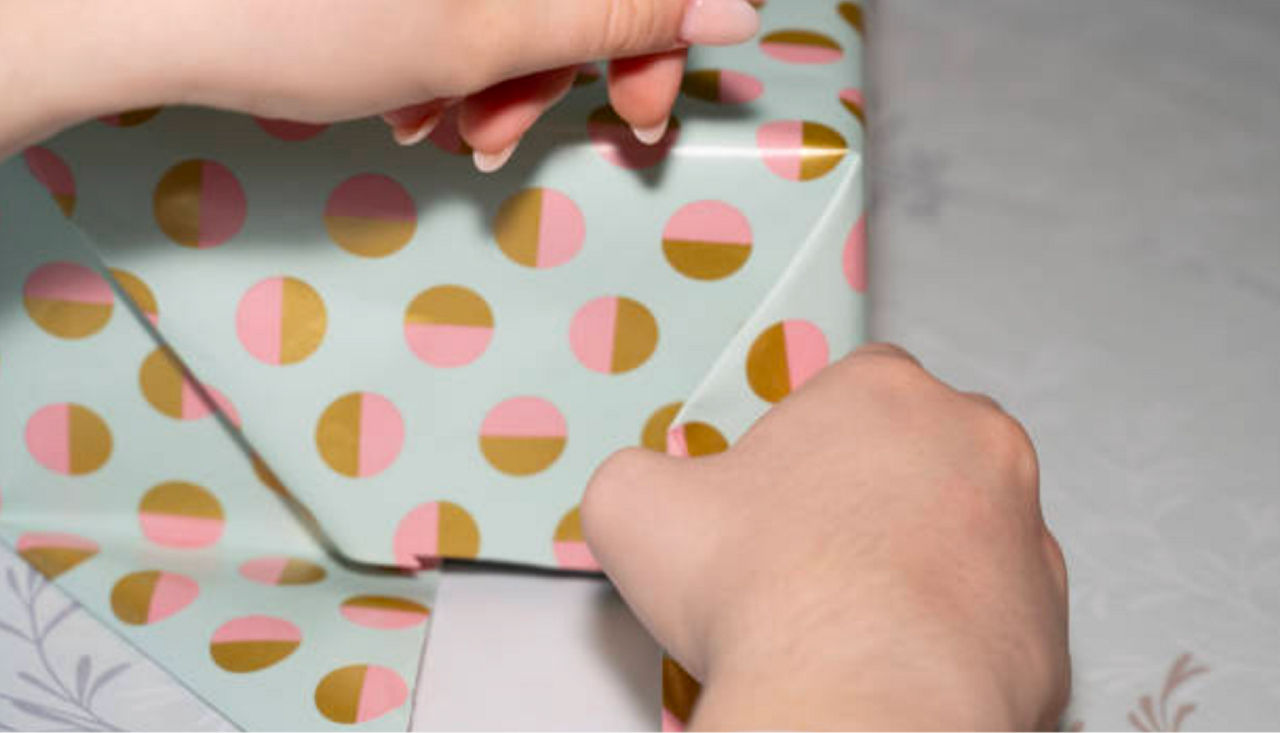
Move to one open end of the gift and push the side sections inward to create two triangular shapes. Flatten each triangle and crease the folds firmly to produce sharp, clean lines. Well-defined folds help the ends look neat and symmetrical. Repeat the same process on the opposite side of the gift before moving on to the final folds.
Step 5: Close the ends
Fold the top flap downward so it sits neatly against the box. Next, fold the lower flap upward and over the first fold to fully close the end. Keep all fold’s snug against the gift to prevent loose corners or excess bulk. Secure the flaps with a small piece of tape and repeat the same process on the remaining end of the package.
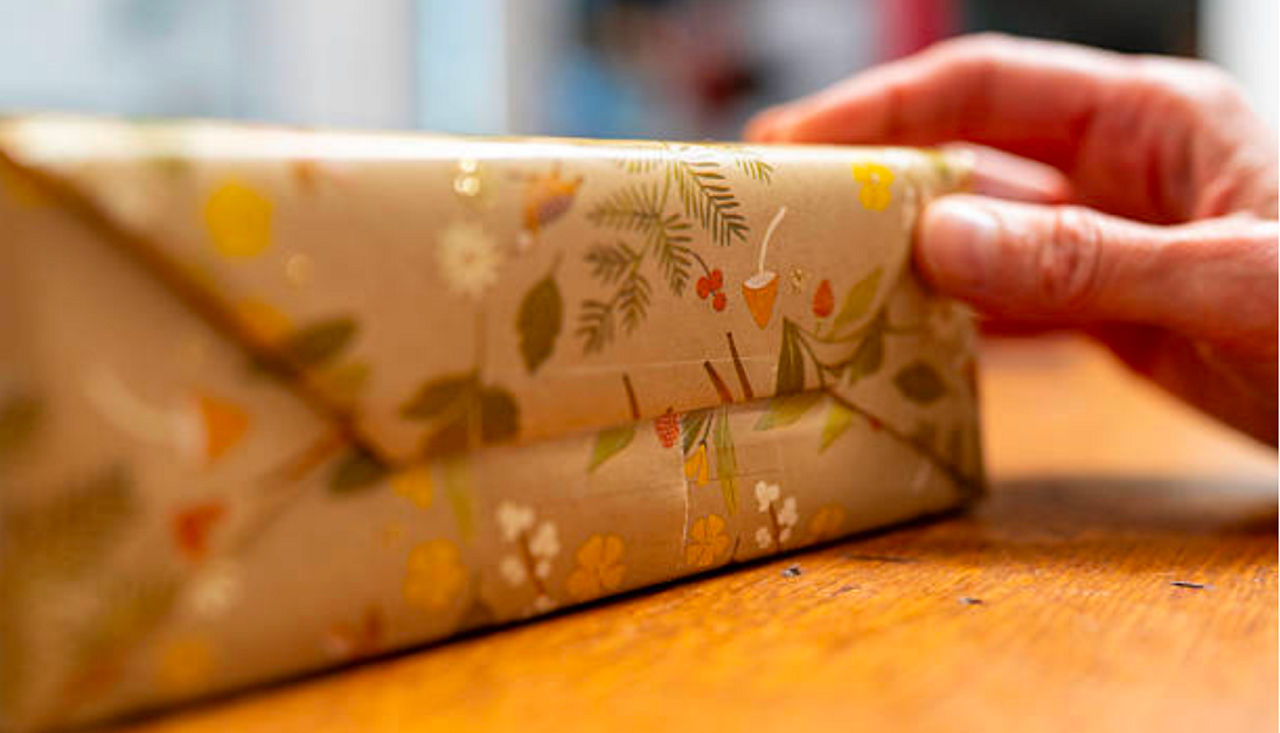
Step 6: Add finishing touches
Once the gift is fully wrapped, add decorative elements that suit the occasion. A ribbon can add colour and texture, while a bow creates an attractive focal point. Attach a gift tag so the recipient can be easily identified. Matching colours and decorations can make the presentation feel more coordinated and thoughtful.

Wrapping in Canadian holiday conditions
Holiday schedules, winter weather and seasonal gatherings can make gift wrapping feel more hectic than usual. Planning and staying organized can help you manage wrapping tasks more efficiently throughout the busy season.

Holiday and winter wrapping tips
One of the best ways to reduce holiday stress is to start wrapping gifts early. Wrapping items shortly after purchasing them helps spread the workload over several days or weeks rather than leaving everything until the last minute. It also gives you more time to focus on neat folds and presentation.
Keeping extra supplies available is especially useful during busy holiday periods. Running out of tape, gift tags, or wrapping paper can interrupt your progress and create unnecessary stress. Maintaining a small supply of backup materials ensures you're prepared for unexpected gifts and last-minute additions.
Winter conditions can also affect wrapping materials. Choosing sturdy wrapping paper reduces the chances of tearing during folding, storage, or transportation. Durable paper can be particularly helpful when gifts are being moved between homes, gatherings, or celebrations.
Many people find it helpful to create a dedicated wrapping station during the holidays. Keeping scissors, tape, paper, ribbons and tags organized in one location allows you to work more efficiently and avoid searching for supplies. This setup can save valuable time when wrapping multiple gifts.
Finally, label gifts immediately after wrapping them. Similar-looking packages can quickly become difficult to distinguish during the holiday season. Attaching tags right away helps avoid confusion later and keeps your gifts organized throughout the celebrations.

Last minute wrapping tips
When time is limited, simplicity is often the best approach. Gift bags provide a quick and effective solution for oddly shaped items and can create an attractive presentation in just a few minutes. Adding tissue paper can further enhance the appearance with very little effort.
Keeping a small collection of wrapping supplies on hand throughout the year can make unexpected occasions easier to manage. Having paper, tape, gift bags, ribbons, and tags readily available helps you avoid last-minute shopping trips and allows you to wrap gifts whenever the need arises.
Simple wrapping designs can also save time without sacrificing appearance. Solid-colour paper paired with a coordinating ribbon often looks elegant and requires less effort than more elaborate decorative styles. When you're in a hurry, focus on smooth paper, straight seams, and secure folds rather than complicated embellishments. A simple but tidy presentation is usually more impressive than a rushed, complex design.
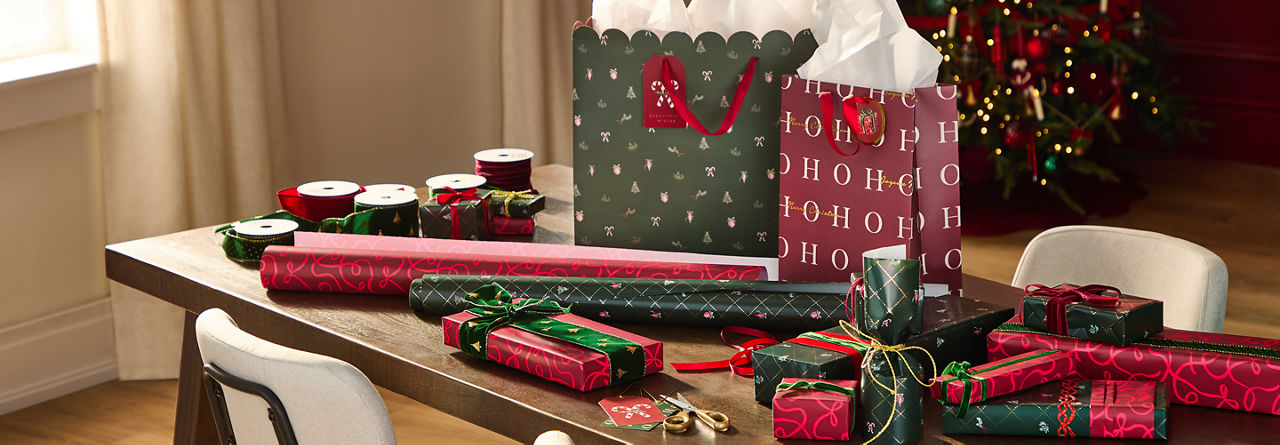
Gift wrapping methods explained
There are several ways to wrap gifts, and choosing the right approach depends on the size, shape and nature of the item being presented.
Standard box wrapping is the most common method and generally the easiest for beginners. Rectangular and square boxes provide flat surfaces and defined edges that allow for precise folds and clean-looking seams. This technique works well for most gifts and typically produces the most polished appearance.
Gift bags and gift boxes are ideal for unusual or difficult-to-wrap items. They eliminate much of the measuring and folding required with traditional paper wrapping and offer a convenient solution for gifts with irregular shapes.
Tissue wrapping is often used for delicate, lightweight, or soft items. Tissue paper can help protect fragile contents while adding colour and visual appeal. It is commonly paired with gift bags and boxes to improve both presentation and cushioning.
Fabric wrapping is a reusable alternative to standard wrapping paper and appeals to those looking for a more eco-conscious option. Decorative fabric can securely hold gifts while reducing waste, and the fabric itself may become part of the gift.
Understanding these options can help answer common questions about wrapping awkward or oddly shaped gifts. Selecting the right method for the item can simplify the process, improve presentation, and make wrapping feel more manageable regardless of the occasion.
FAQs
Wrap the gift in colourful paper and finish it with decorative details like ribbon, twine, bows, gift tags or small ornaments. Mixing textures and adding personal touches, such as a handwritten note or sprig of greenery, can make a simple package look thoughtful and festive.
Avoid using too much or too little wrapping paper, as this can create bulky folds or expose parts of the gift. Crooked edges, loose tape and oversized bows can also make a wrapped present look less polished, so measure carefully and secure everything neatly.
Use a sheet of pre-cut wrapping paper, place the gift in the centre and quickly fold the long sides over before securing them with tape. Fold in the ends, tape them down and finish with a peel-and-stick bow for a fast, tidy presentation.
Yes. The key is to use the right amount of wrapping paper and create crisp folds at every edge for a cleaner finish. Double-sided tape can help hide seams, while sharpening corners as you fold gives gifts a more professional, store-wrapped look.

